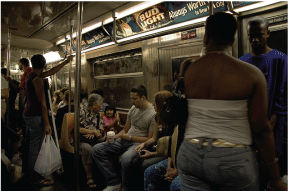
 Step 1: The Original
The image below is an image from the subway in New York City. As you can see, the image is lacking a bit of contrast and also has a slight underexposure. It's not that bad, but it looks somewhat dirty and dark. The image has plenty of shadows, but the mojority of the highlights have been washed out in that inadequate light was present when the photo was taken. Many of the figures look like sillohuettes in the dim light.
Step 2: Setting the Black Point
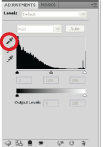
We are now going to set the black and white points in the Levels settings. After duplicating the original layer, create a new adjustment layer in the Layers palette. This is the half-white, half-black circle located at the bottom of the palette.
Step 3: Black point settings
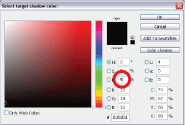
You will see a color picker. Set everything to solid black and then change the setting under "B" to 5, as shown below. This sets the black point to 95% black. Click OK
Step 4: Setting the White Point
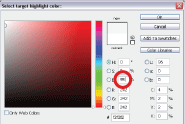
Double-click the Set White Point tool, which is the white eyedropper. In the color picker, set for pure white and then enter 95 into the "B" setting as shown to the left and below. The white point is now set to 95% white.
Step 5: Finding Shadows
We are now ready to perform the image correction. We will click the Set Black Point tool in the darkest part of the image and the Set White Point tool in the lightest part.
To locate the darkest part of the image, hold down the Alt (Option on
Mac) key, and as you move the shadow slider to the right, the image
 should turn white. As you move the slider you will see some areas start to show through. This is the Black
 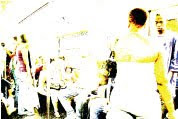 Point threshold, as show to the left. The areas that start to show are the darkest areas of the image.
Step 6: Adjusting the Shadows

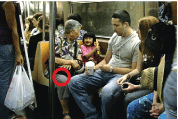
Take note of where the dark portions of the image are on the threshold and return the slider to the far left. Choose the Set Black Point tool and click on the darkest portion of the image in the main image window as shown in the image to the right. The image will be shifted and the area we clicked on will now be set to the 95% black that we selected earlier.
Step 7: Finding Highlights
Hold down the Alt (Option on Mac) key and move the right slider to the left to reveal the whitest point of the image. The image will
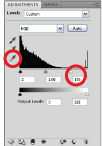 begin as black and the highlight areas will show through as shown below.
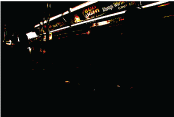 Step 8: Adjusting Highlights
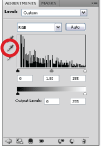
Choose the Set White Point Eyedropper tool from the Levels palette. Click on the whitest area of the image as shown below. The lightness of the image will be adjusted to match.
Step 9: Setting the Gray Point
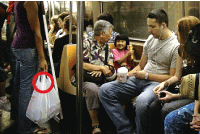
The tonal qualities of the image look much better now and the colorcast is reduced a bit. Now to totally remove the color cast. Choose the Set Gray Point eyedropper from the Levels dialog box (below). When we click on the image with this tool it will choose the selected area as the gray point of the image and balance all the color to match. Click on a portion of the image that should be a neutral gray, such as the ladies pants. The colors will shift; if you are not happy, keep experimenting by clicking the Set Gray Point tool in different parts of the image.
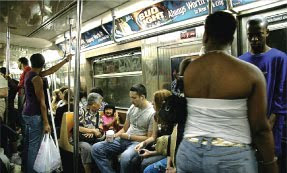
When you are happy with the result, click OK to apply the Levels to the image. You have now learned how to use the Levels tool correctly. The image below shows the final corrected image, a huge improvement from the original. Now the figures can clearly be seen without being lost in the shadows of the image.
Our group was: Jeremy, Jeremiah, Aleasha, Cindy, and Juan.
ReplyDeleteTeam Jeremiah did a great job!
ReplyDelete